
3 posts tagged with "connectors"

View All Tags

Using adaptive colours to diagram in light and dark modes

· 5 min read
draw.io
draw.io Team

When you change from light to dark mode in draw.io, the colours automatically switch intensity so that your diagram and its labels are easy to read. You can set now specific colours for shapes, connectors, text and the diagram page background for both light and dark modes via the updated colour palette.
An additional custom colour scheme has been added to the style palette in draw.io

Adaptive colours are important when part of your team prefers to work in dark mode, and the rest prefers light mode.

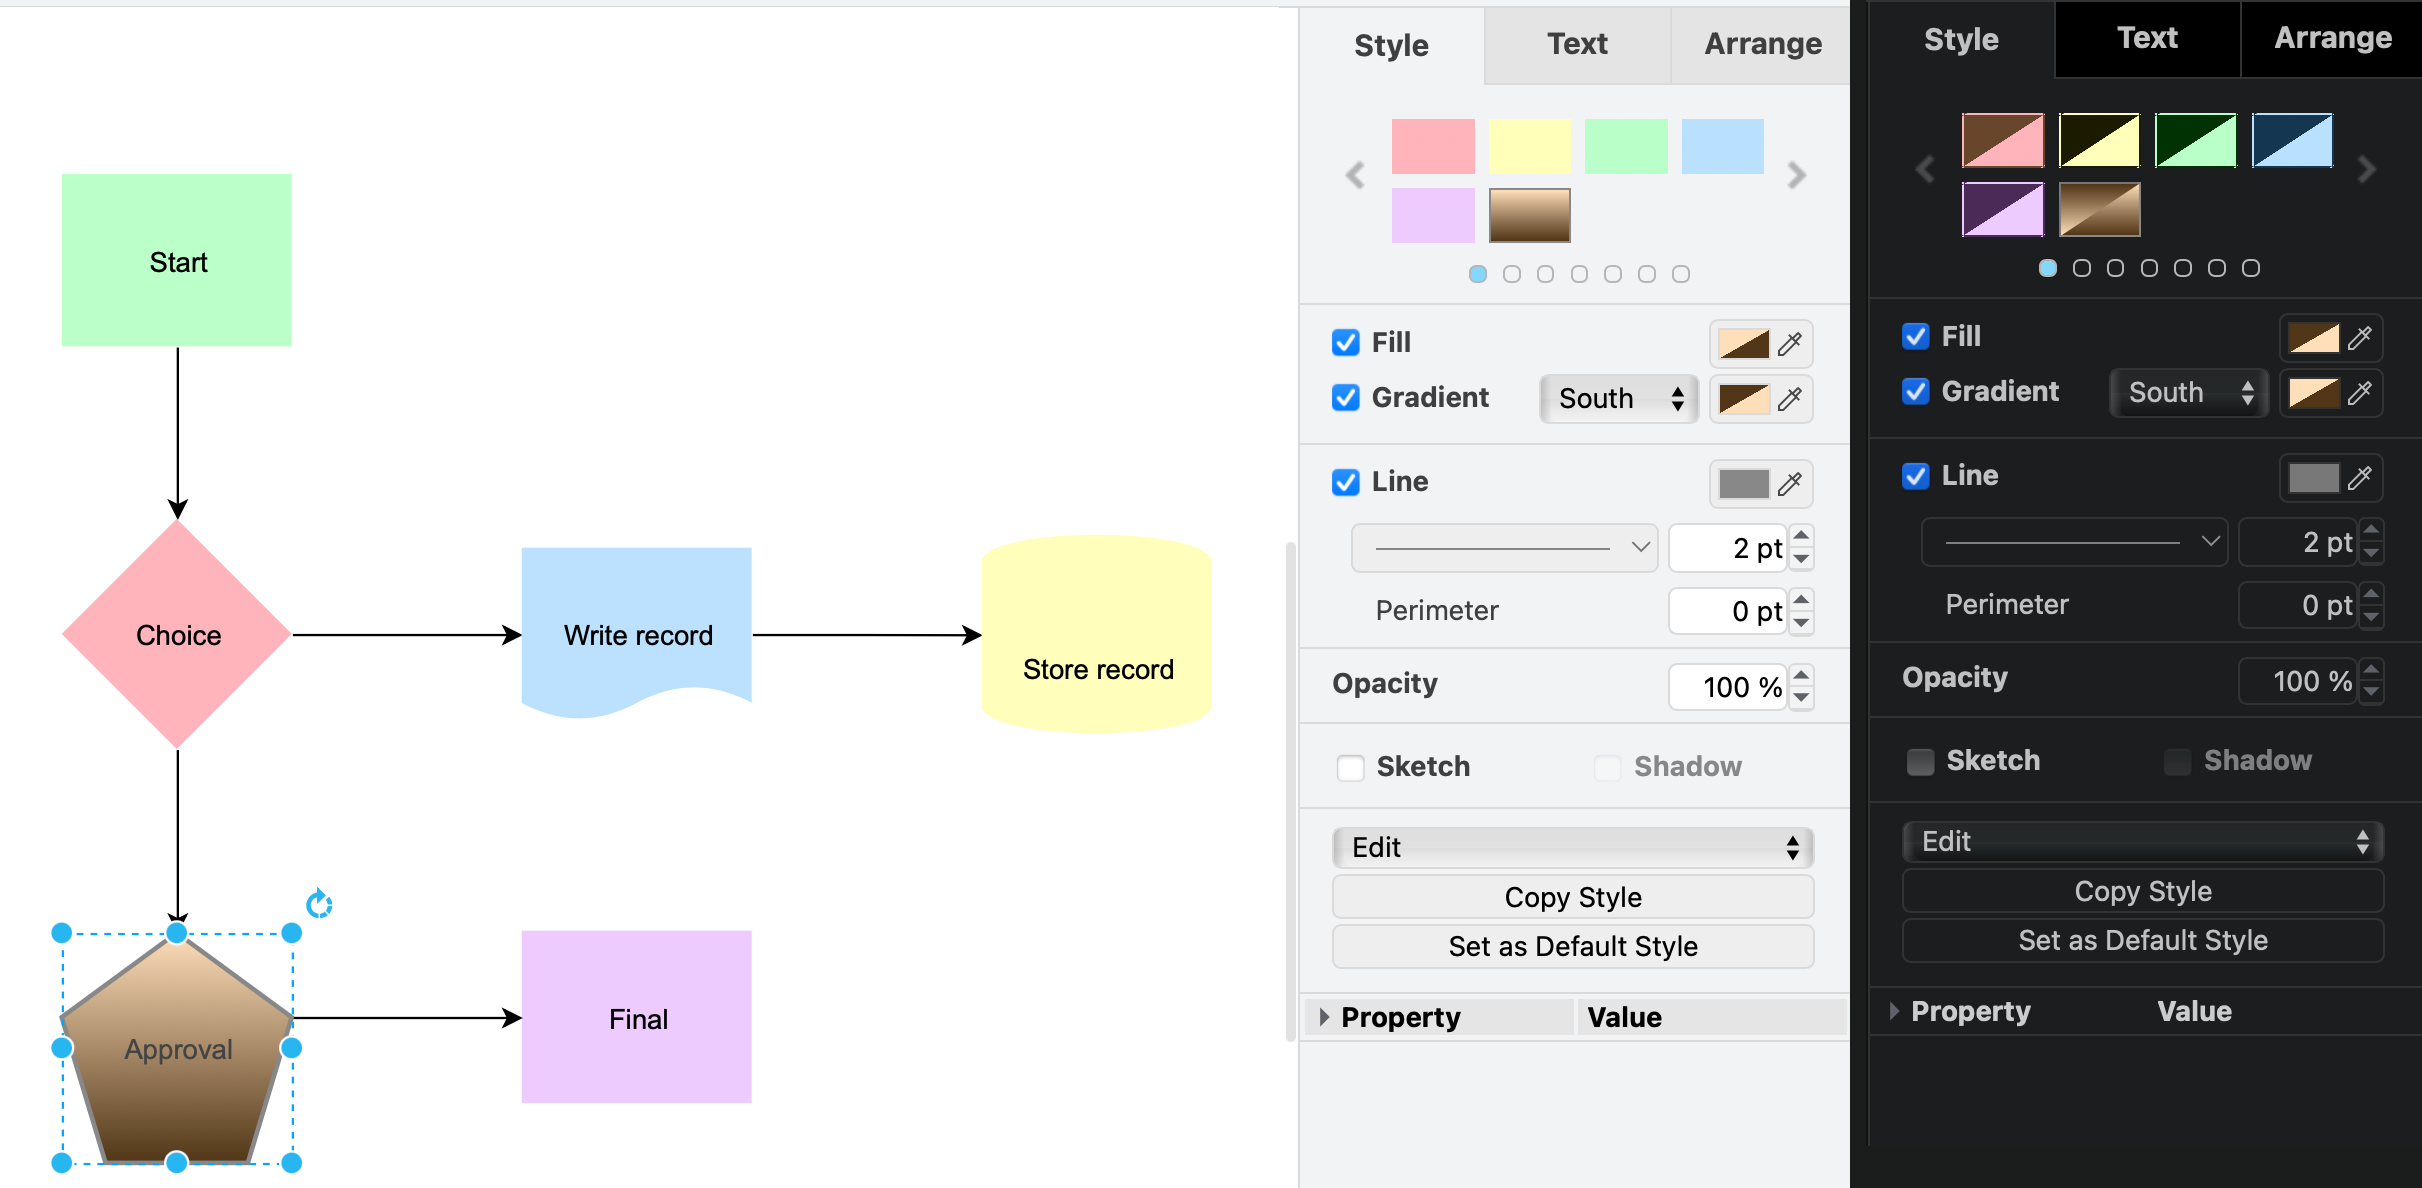
Colour style - use a specific dark and light colour

  1. Select one or more shapes, connectors, text labels, or the diagram background, then click on a colour block to open the colour palette, for example, the Fill colour of a shape.
    Select one or more shapes and open the colour palette
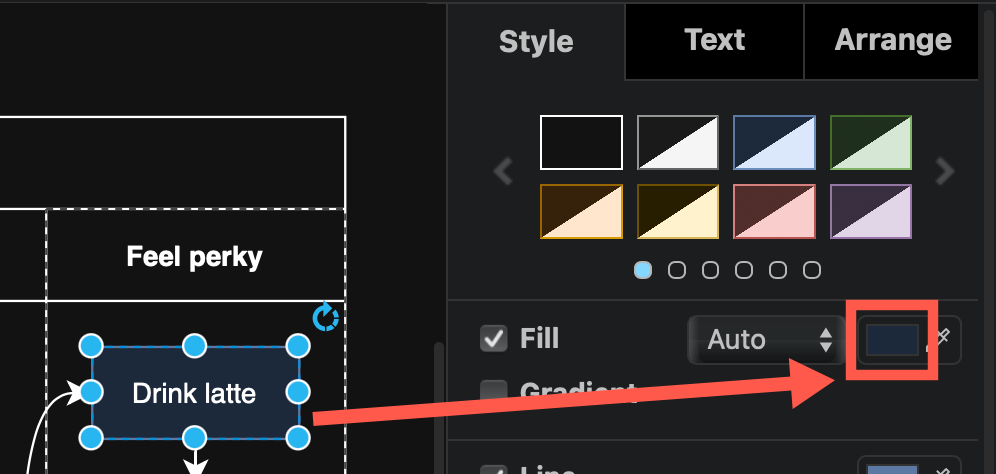
  2. Click Advanced to see the dark mode colour settings in the palette.
    Select one or more shapes and open the colour palette
  3. Enter a colour value in the Light mode field (sun). The dark mode value will update automatically to its inverse if you are using the Automatic adaptive colour setting.
  4. To use a specific dark mode colour instead, enter a different colour value in the Dark mode field (moon). This colour is now User-defined.
    Select one or more shapes and open the colour palette
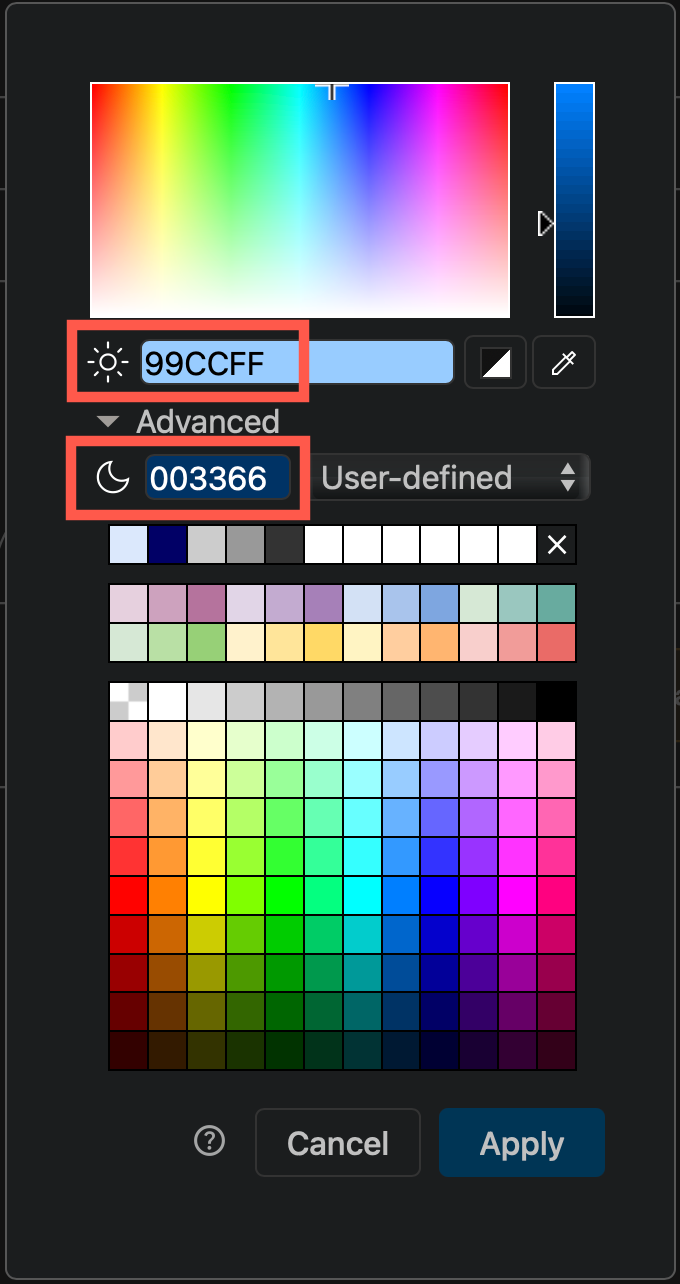
  5. Click Apply to save the colour style to your selected shapes, connectors, text or diagram page background.

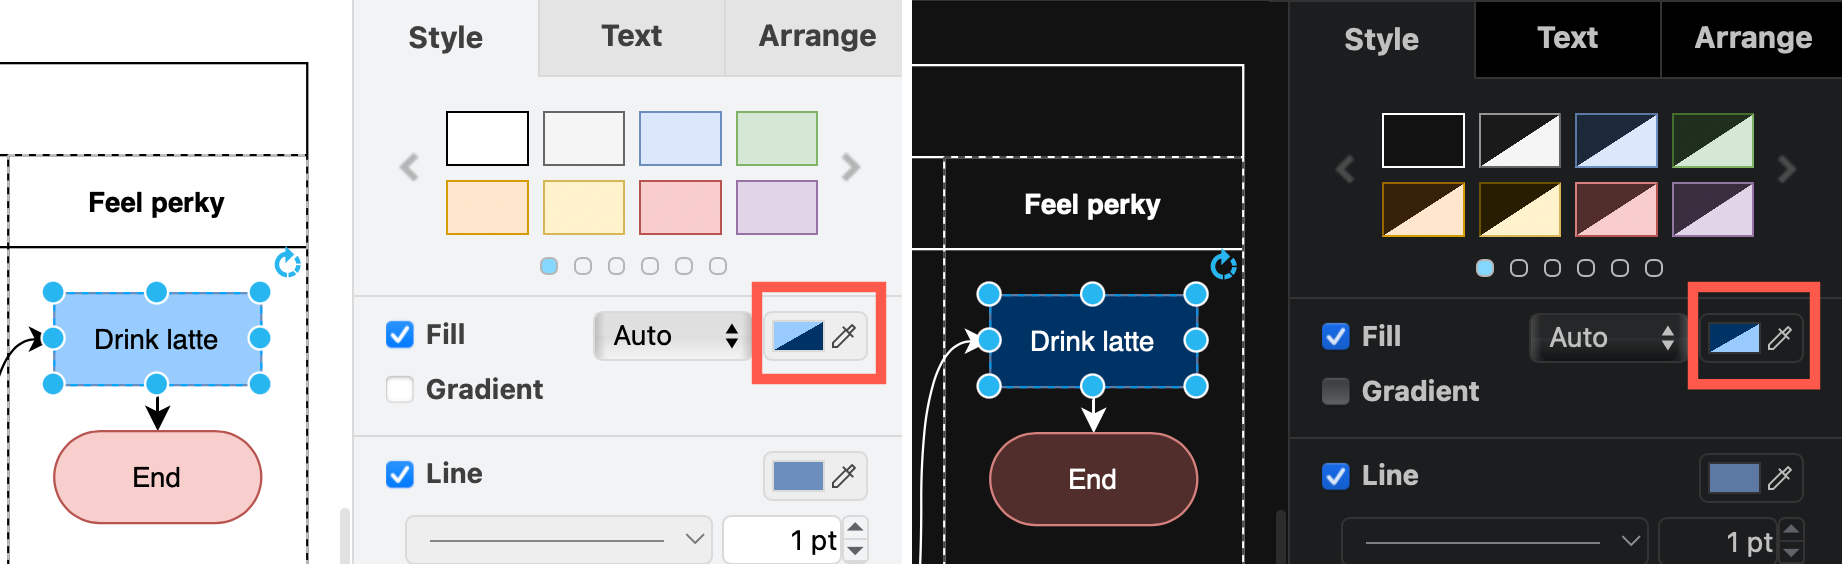
You'll notice that the colour block now has two triangles, in both dark and light mode.
Change the adaptive colours settings on a diagram in draw.io via the Extras menu or the Style tab in the format panel when nothing is selected

Tip: To use the same colour in dark and light modes, enter the same value in both fields.

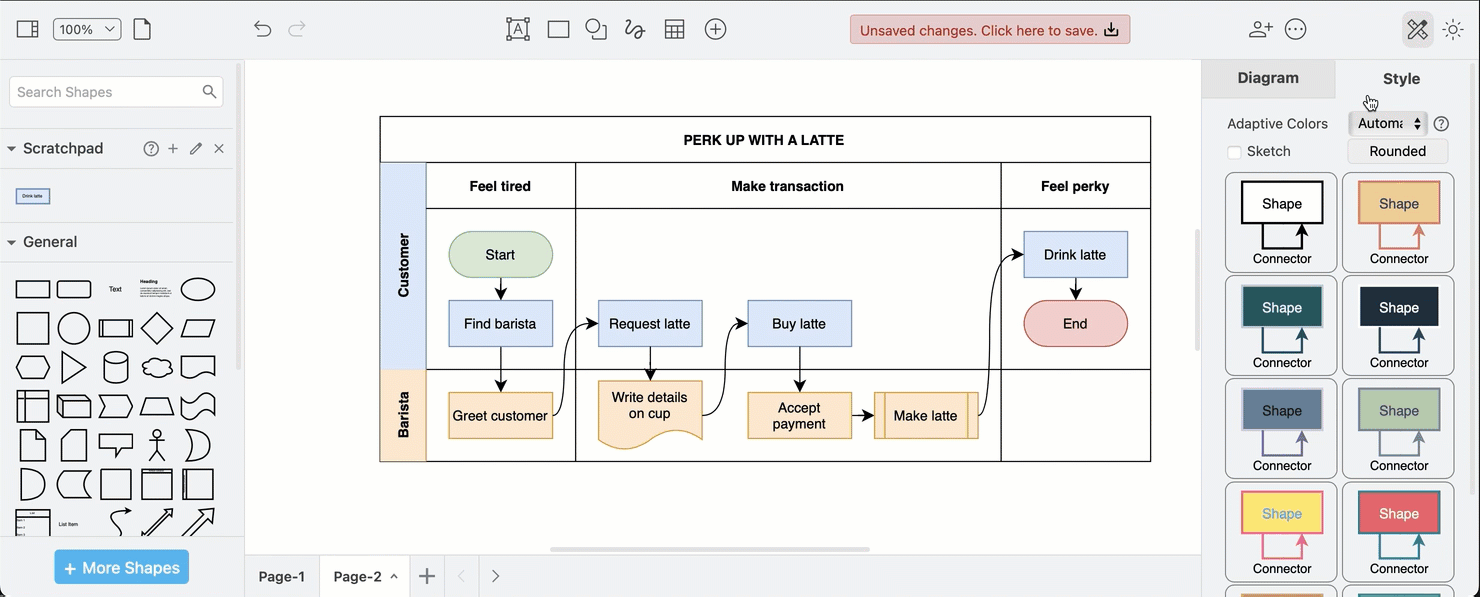
Adaptive colour settings

Each page in a multi-page diagram has its own adaptive colour setting.

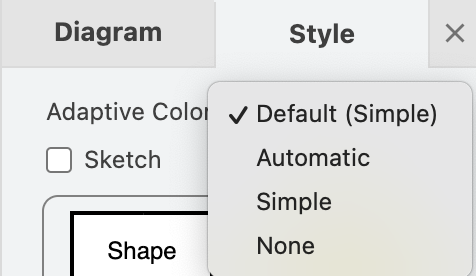
With nothing selected in your diagram page, click on the diagram Style tab. Change the Adaptive Colors setting. Alternatively, select Extras > Adaptive Colors from the menu.
Change the adaptive colours settings on a diagram in draw.io via the Extras menu or the Style tab in the format panel when nothing is selected

  • Automatic: Changes the intensity to enhance the contrast of all coloured elements in a diagram. This is set by default.
  • Simple: Improves the contrast of only the black and white elements, and retains all other colours. Thus the same palette can be used in dark and light modes.
  • None: Disables adaptive colours in dark mode completely. Diagrams will appear as they would in light mode even if you enable dark mode in the draw.io editor.
Change the adaptive colours settings on a diagram in draw.io via the Extras menu or the Style tab in the format panel when nothing is selected

Set defaultAdaptiveColors in the draw.io configuration to simple or none when you want your diagram colours to stay the same in light and dark modes.
Select one or more shapes and open the colour palette

Step by step: Configure default adaptive colours

Sharing diagrams with adaptive colours

The adaptive colour settings are saved in the diagram file. When you share your diagram file, a URL link with the diagram or HTML code with the diagram embedded, when it is reopened in the editor, the diagram will display with the adaptive colour settings it was saved with.

Diagrams pose a particular challenge when automatically adjusting colours for readability in dark mode.

If you want to reset a diagram to automatically adapt to dark mode, you can remove all the user-defined dark-mode colours.

See how to set custom dark-mode colours in the style and colour palettes with the light-dark function for each color definition.

Learn more about how adaptive colours work when you export to an SVG image.

Support for hand-drawn diagrams with rough.js

· 5 min read
draw.io
draw.io Team

A more relaxed and informal style for shapes, fills and lines is often used in infographics, teaching materials, maps and reports so that the diagrams are little less sterile and boring. The rough style adds a hand drawn shading options, rough outlines and connectors, and handwritten text labels.

We spent a couple of hours integrating rough.js to update our existing, and fairly limited, comic style, and the result is pretty useful.

Note: This rough style is available in version 13.3.1 onwards.

Apply the rough style

  1. Select one or more shapes and connectors that you want to roughen.
  2. In the format panel on the right, click Sketch to apply the rough style to your selected shapes, labels and connectors.
Select shapes, click Sketch in the format panel, and save your diagram to make it more informal

Use the comic style

The rough sketch style appears more like a handdrawn diagram. Use the comic style for a more subtle effect.

  1. Select the shapes and connectors you want to apply the comic style to.
  2. In the Style tab of the format panel, click on Properties.
  3. At the bottom, change the Sketch Style dropdown to Comic.
Change the sketch style to comic for a more suble handdrawn effect

Change properties to customise the sketch style

There are many other properties you can change to customise the sketch style. Note that not all of these properties are applicable to the style you have chosen, but may apply to a different style.

Click on a shape or connector, then expand the Properties section in the Style tab of the format panel on the right. The most common properties are as follows.

  • Jiggle - how roughly or randomly the borders, connectors and the fill colours are drawn.
  • Fill Weight - set the width of the 'pen' used to draw the fill colour in a shape.
  • Hachure Gap - set the distance between the sketched fill lines.
  • Hachure Angle - set the direction of the sketched fill lines. Alternatively, change the angle with the Direction shape property.
  • Disable Multi Stroke - use only one pass of the 'pen' in the sketched border of a shape or a connector.
  • Disable Multi Stroke Fill - use only one pass of the 'pen' in the sketched fill colour in a shape.
  • Sketch Style - choose between the rough and comic sketch styles.
You can change many style properties to customise the rough and comic sketch styles in draw.io

Change the style of the entire diagram

You can set a new global style using one of the presets instead of selecting shapes and connectors and applying styles individually.

  1. Make sure nothing in the diagram is selected, then click on the Style tab in the format panel on the right.
  2. Select the style settings you want to use. Use the preset styles to change the colours of the shapes, their borders and text, connectors and the drawing canvas. Use the checkboxes to quickly change other style settings:
    • Sketch applies the rough style.
    • Rounded rounds the corners of the shapes.
    • Curved changes the connector style to curved.

Note: You will only see the style options that are applicable to the selected shape(s).

Use the styles in the Style tab on the right to change colours and shape and connector styles

Use the rough=1 URL parameter

Alternatively, add rough=1 as a URL parameter so the whole diagram has that style. For example, when using the free draw.io online diagram editor:

https://app.diagrams.net/?lightbox=1&rough=1&highlight=0000ff&edit=_blank&layers=1&nav=1&title=#Uhttps%3A%2F%2Fraw.githubusercontent.com%2Fjgraph%2Fdrawio-diagrams%2Fmaster%2Fblog%2Fgitflow-examples.drawio

A sketchy gitflow using the rough style

See a description of all of the supported URL parameters.

The rough style can make flowcharts a little less intimidating in training and onboarding materials.


A flowchart styled by rough.js


A flowchart styled by rough.js

Snap connectors to an anchor point

· 2 min read
draw.io
draw.io Team

Floating connectors are easy to create - drag a connector from one shape, hover over another shape until the outline is blue, then release.

If you don't want the connector to float freely, but instead you can set them to connect to the nearest anchor point, those little crosses that appear when you hover over an unselected shape. When you move the shape or connector around on the drawing canvas, they will 'snap' to the nearest anchor point. To do this, edit the shape style or the connector style.

Note: If either the shape or the connector are set to snap to an anchor point, this will work.

Connectors can snap to the nearest anchor point on your shape

Change the shape style

  1. Select the shape or the connector.
  2. In the Style tab of the format panel on the right, make sure that the Property section at the bottom is expanded.
  3. Click on the checkbox next to the Snap to Point style label so that it is enabled. Enable the Snap to Point property in the Style tab

Manually edit the shape style

Alternatively, you can edit the style of your shape manually.

  1. Select the shape or connector then click on the Edit Style button in the Style tab of the format panel
  2. Add the following style to the end: snapToPoint=1; then click Apply. Edit the shape or connector style