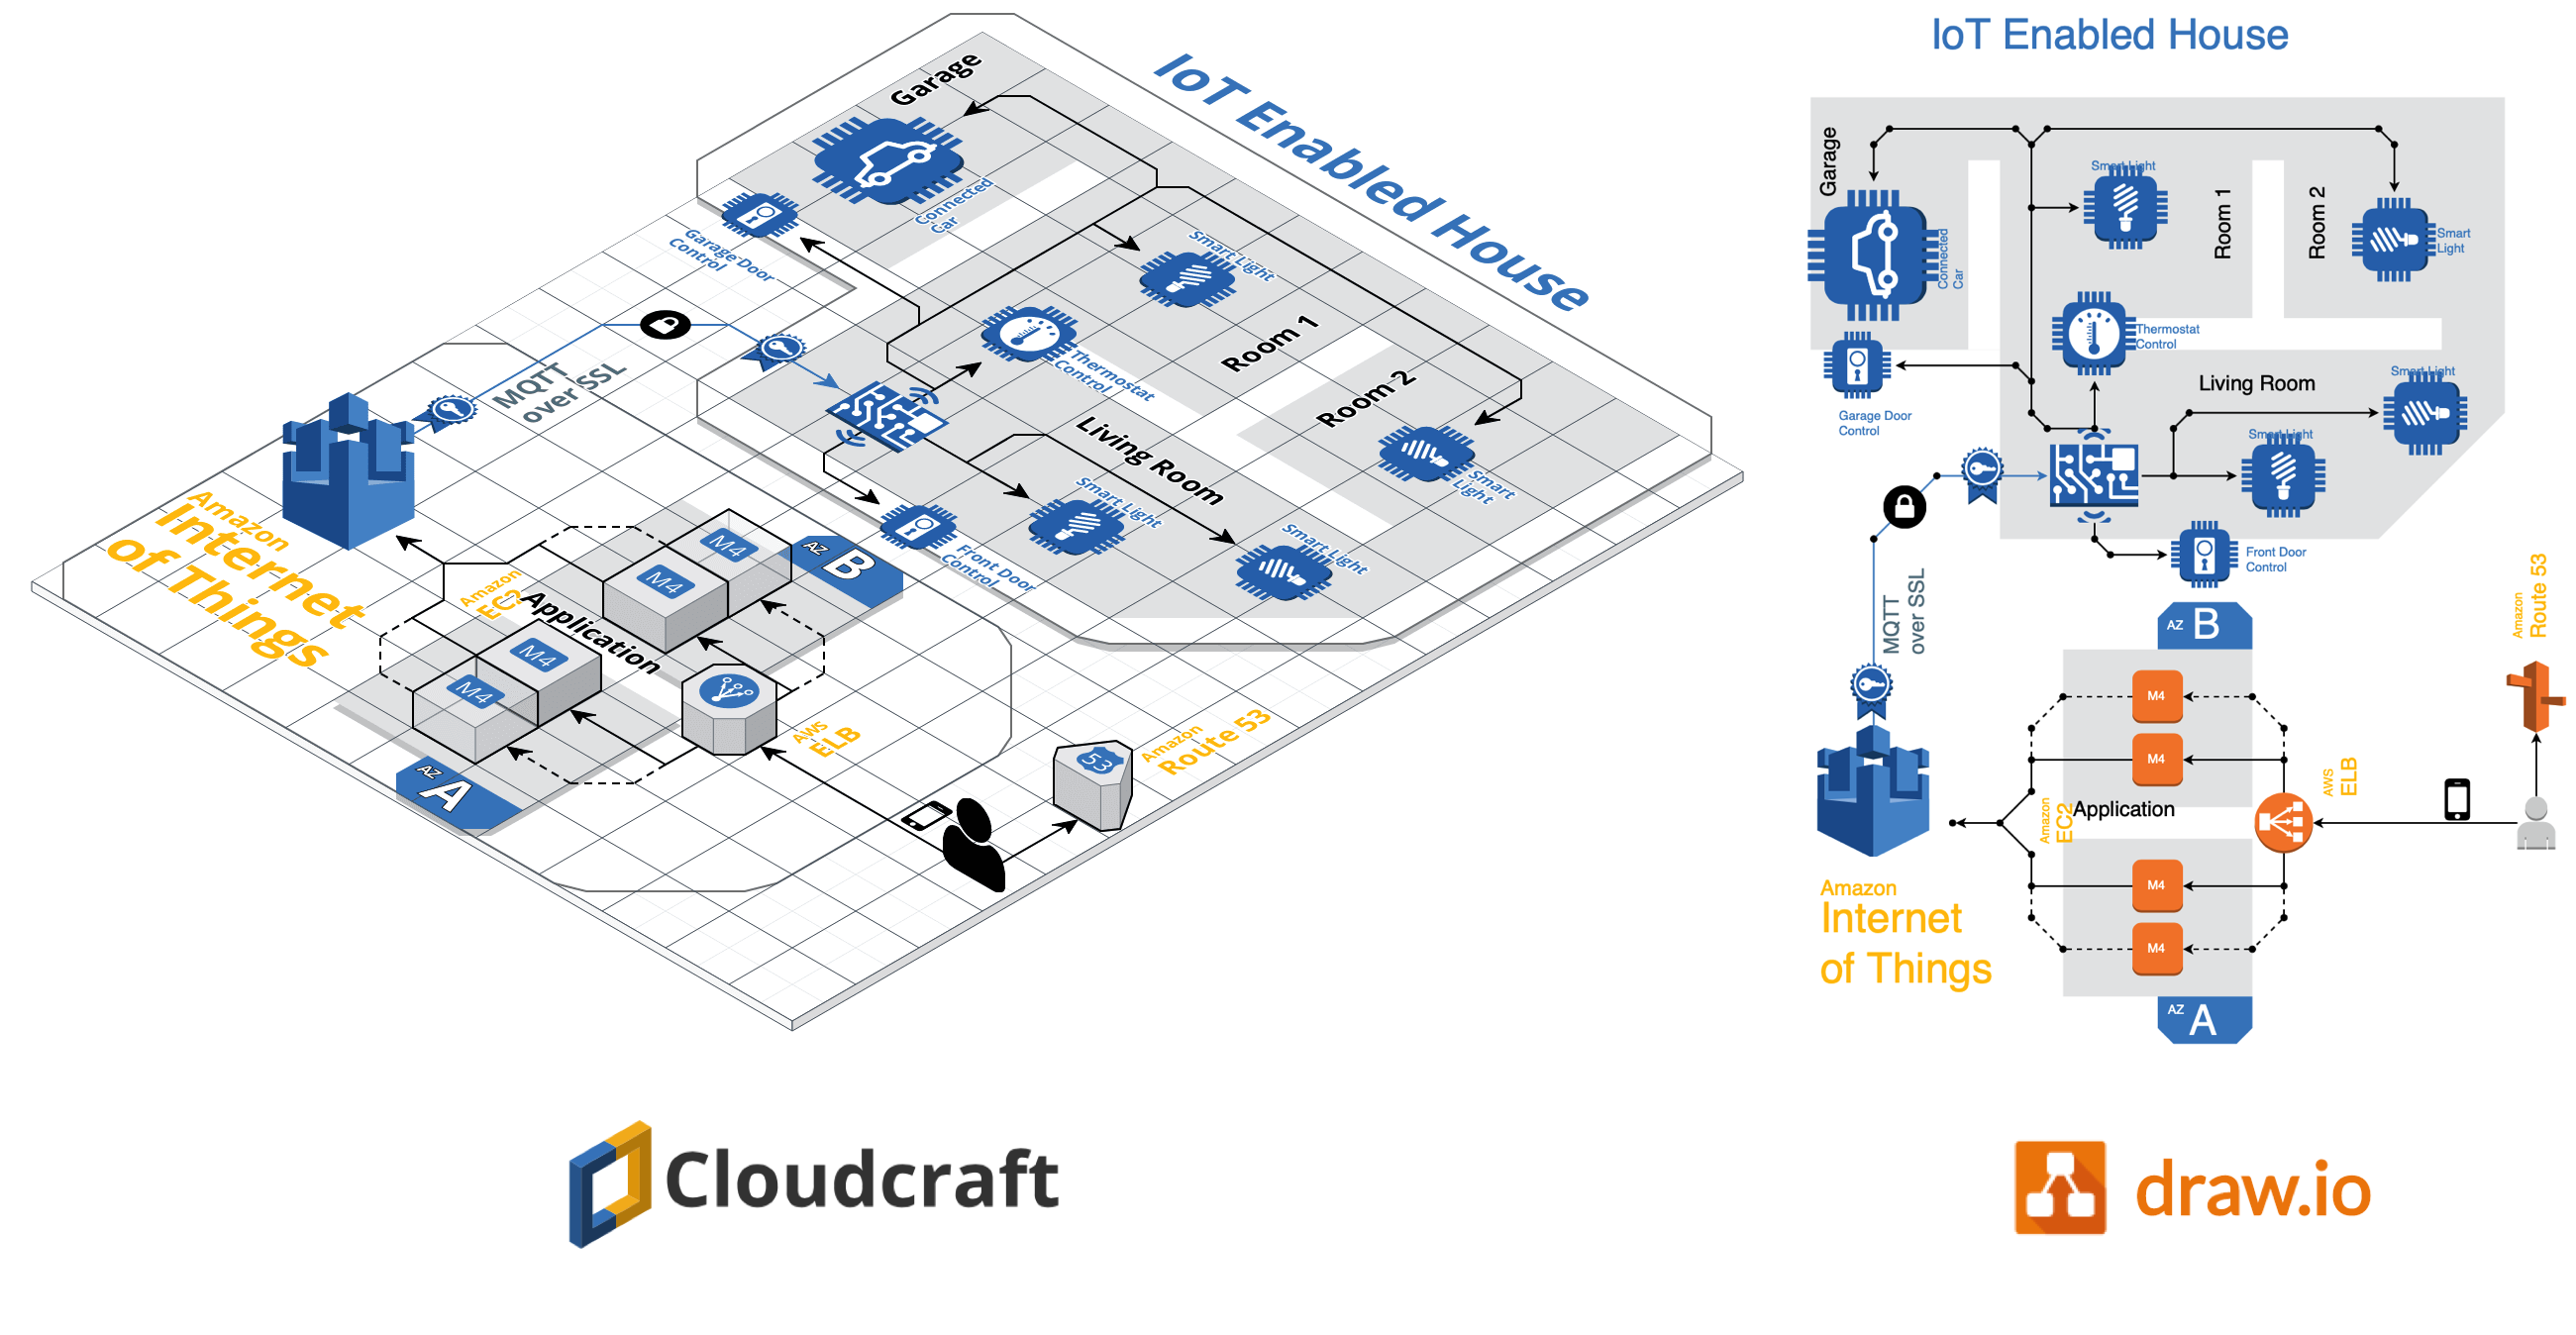
Using Cloudcraft, you can securely connect to cloud environments and infrastructure components via your architecture diagrams where statistics, resource information and more is updated in real time. The 3D isometric view that Cloudcraft uses is familiar to engineers and IT staff as it often matches the tools they learned on. The automatic updates driven from your company's live systems makes Cloudcraft a fantastic tool for monitoring your AWS cloud infrastructure. The statistics are also helpful to estimate costs when you want to make changes to your system.
Get started with your AWS infrastructure using the Amazon Architecture Center's training section and the reference architectures.
AWS architecture documentation also needs to be static
To document how your AWS infrastructure changes over time, you need snapshots - diagrams before and after you make changes. You can't use a live system to document what happened in the past. This is especially important to comply with audit and security standards, and to show progress on your IT infrastructure projects.
Export the various stages of your AWS infrastructure's development into static diagrams. You can easily share these diagrams, open and edit them in draw.io, incorporate them into official documentation and reports, and store them in your revision control system to ensure compliance and painless audits.
Cloudcraft makes it easy to export to draw.io.
How to export from Cloudcraft
Note: Please allow pop-ups in your browser.
In your Cloudcraft account, in the top right of the drawing area, click Export > 2D export to draw.io
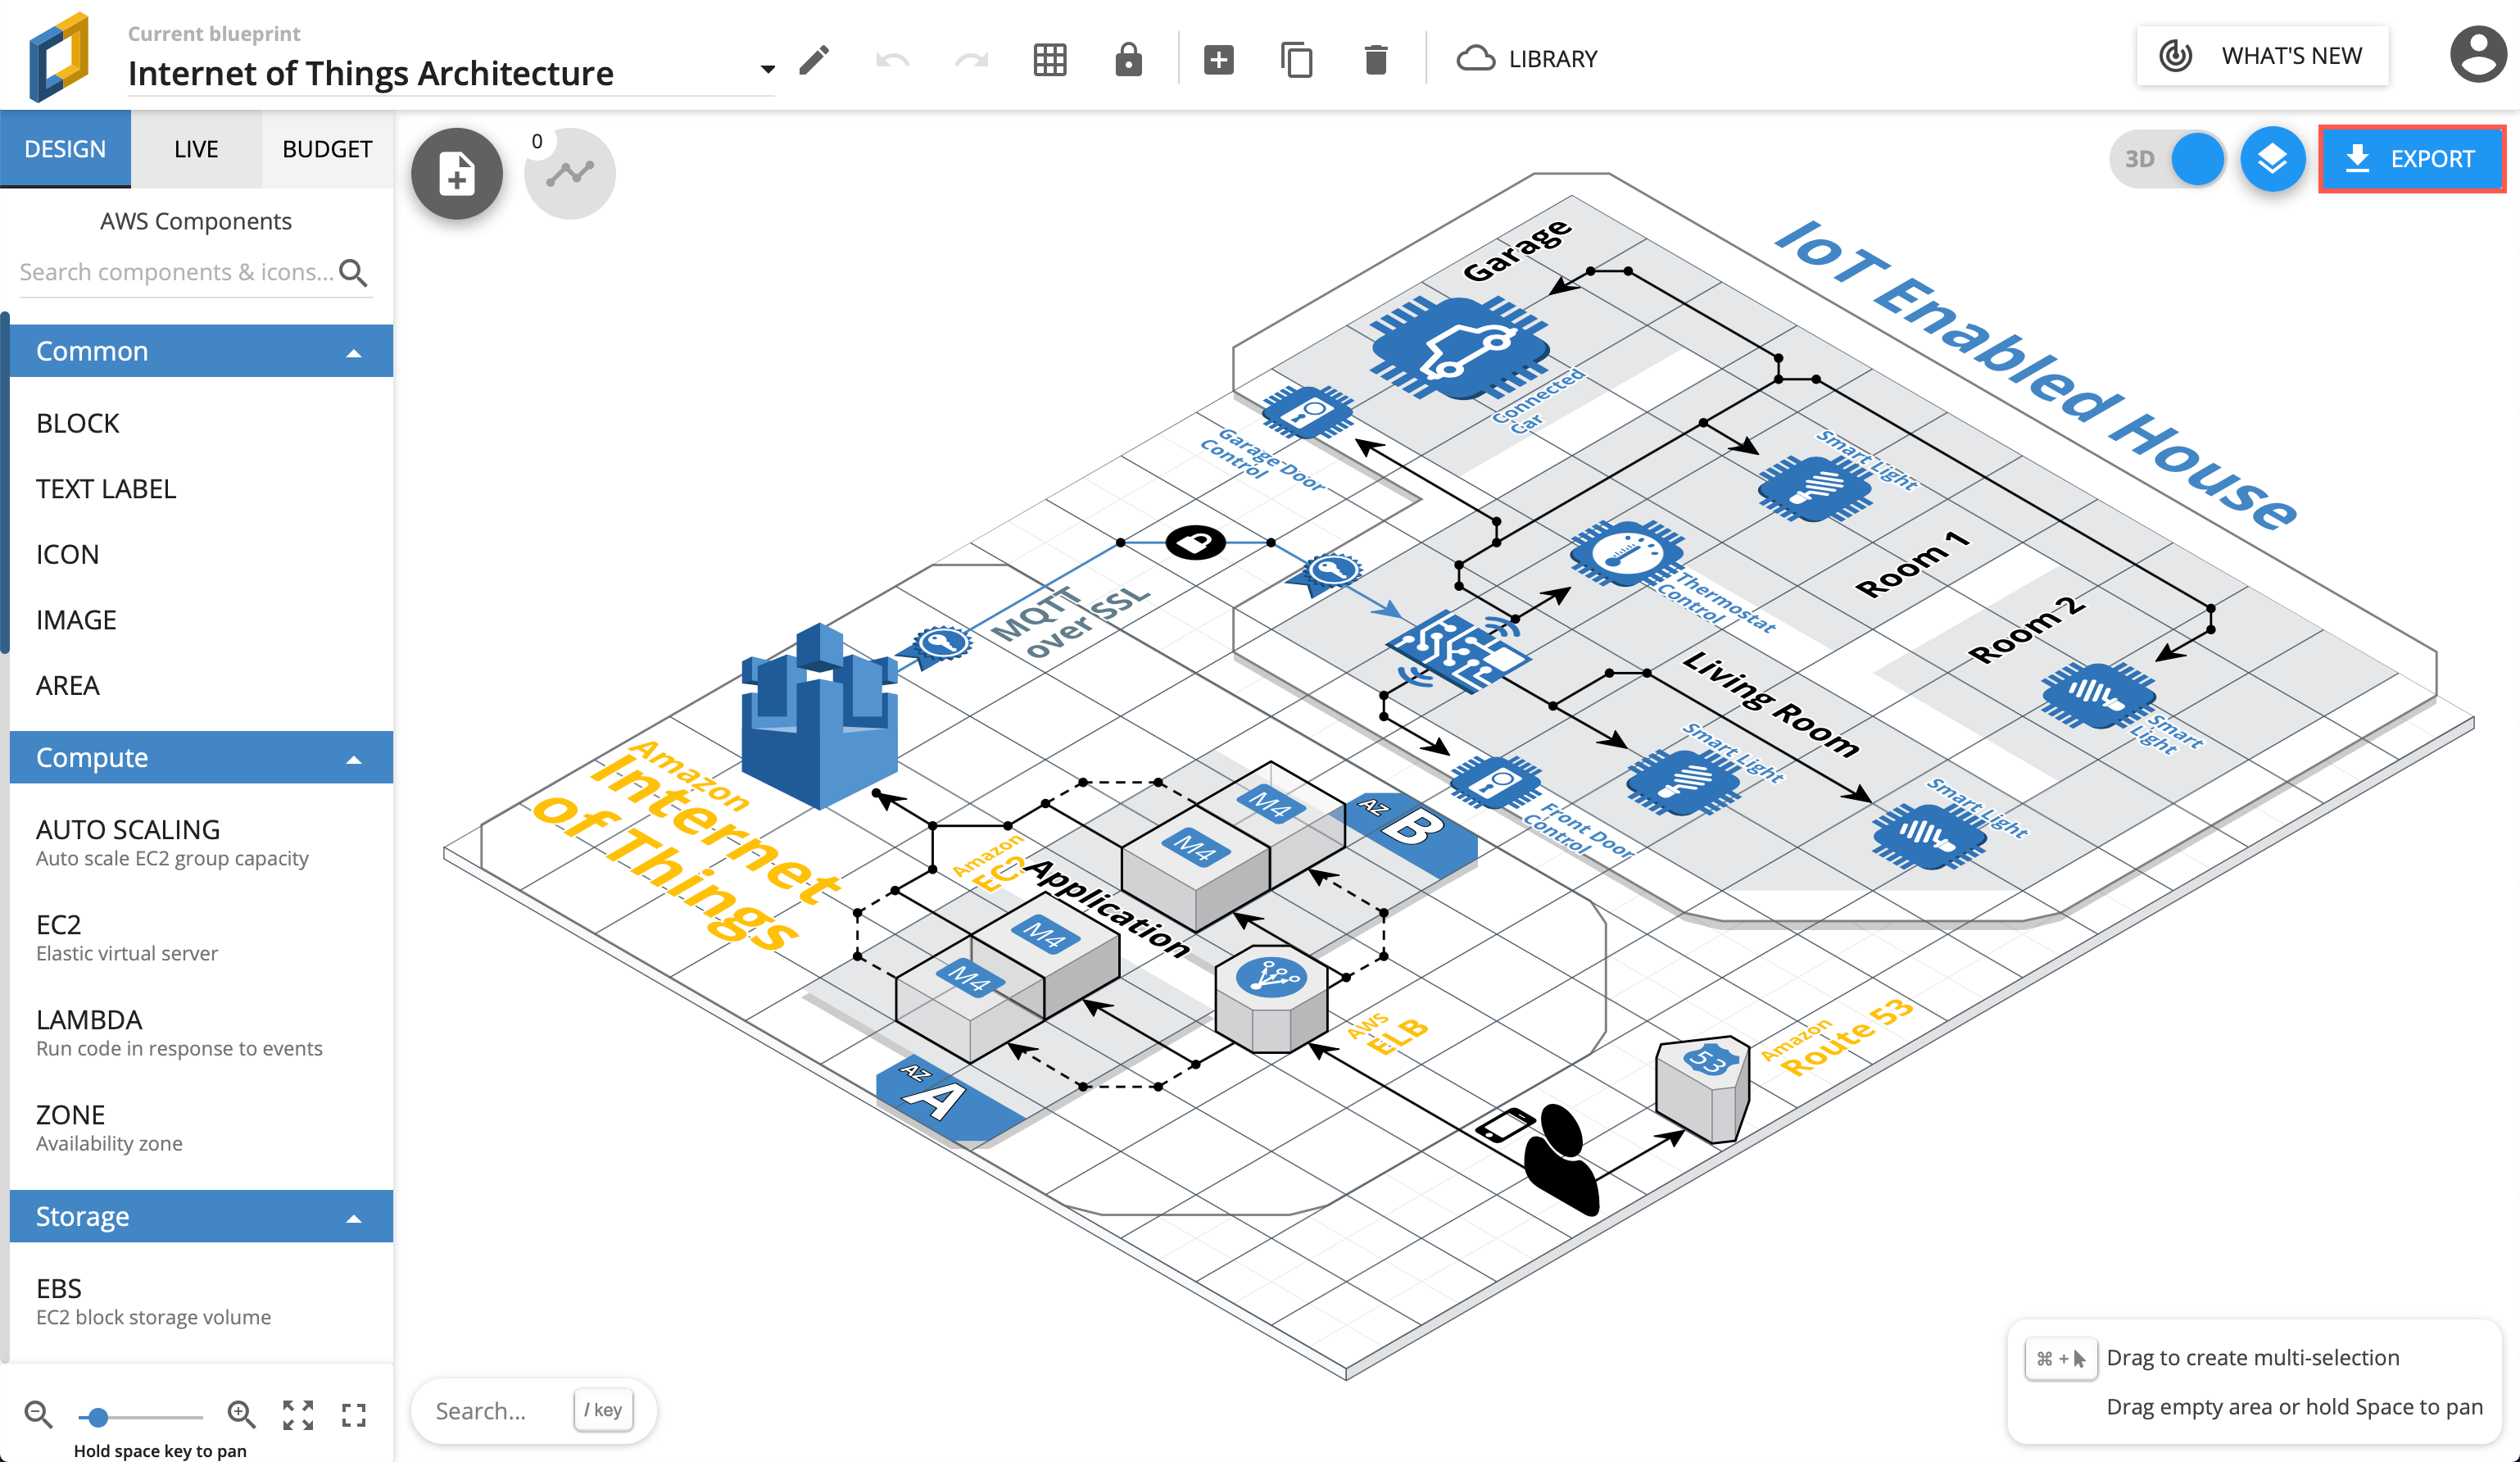
The draw.io version of your AWS architecture will open in a new tab in your browser. You can now save this diagram file to your version control system, cloud storage platform, or whichever location you have chosen to maintain a record of your infrastructure.

When exporting to draw.io, Cloudcraft may not use the most recent AWS shapes in your diagram, but it's easy to update your diagram to the newest AWS shapes yourself.
Editing AWS diagrams in draw.io
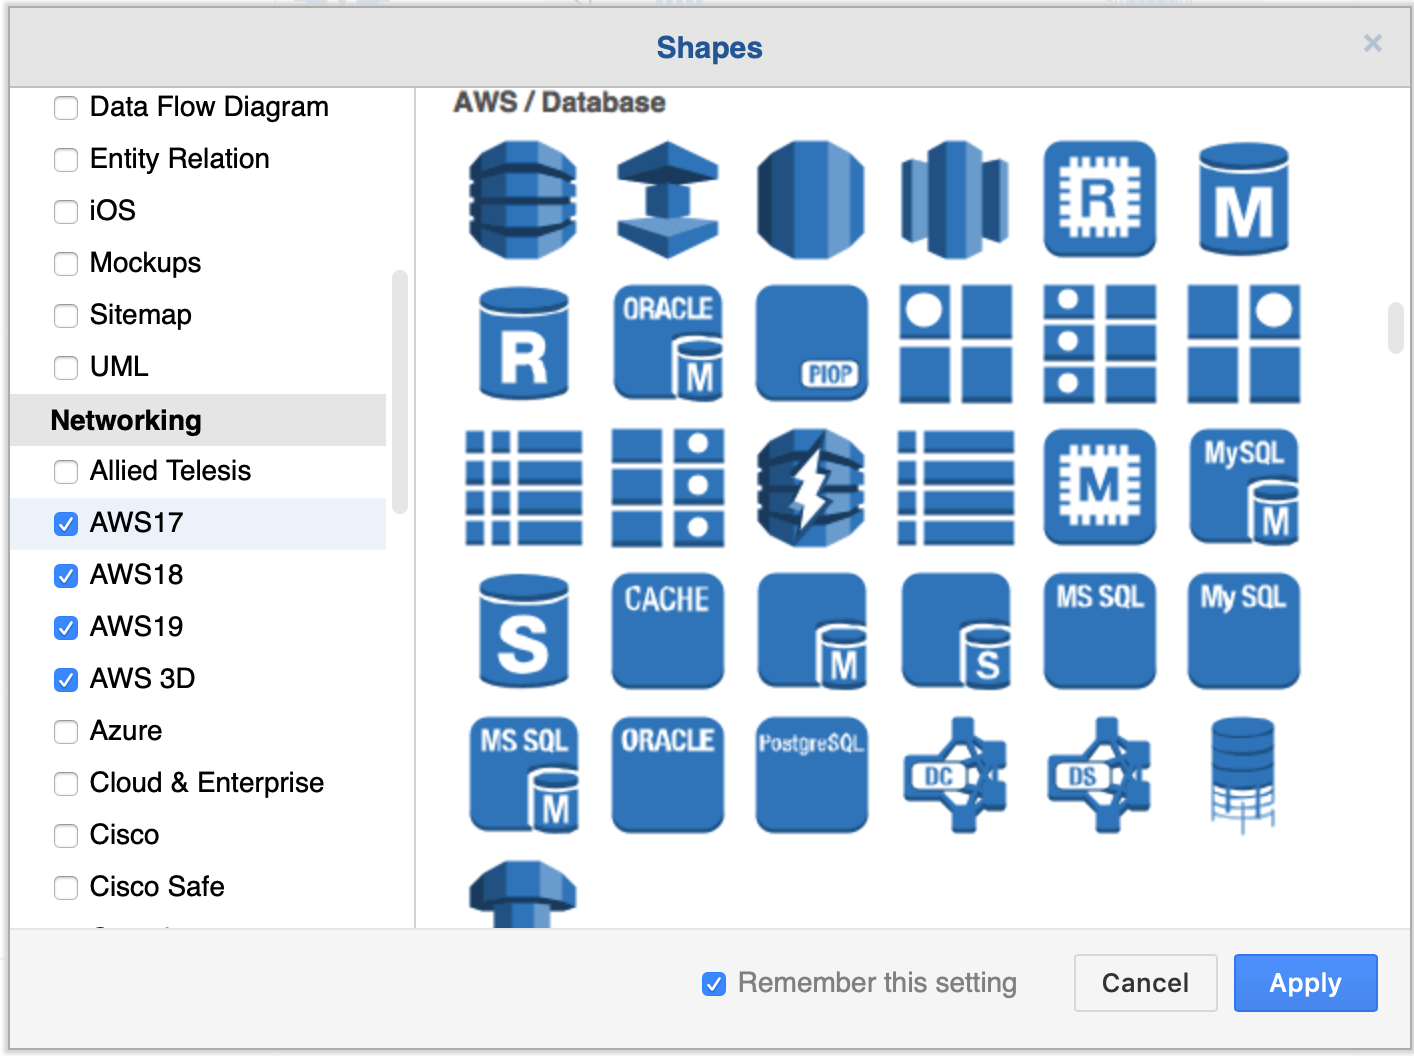
First, enable the AWS libraries. Click More Shapes at the bottom of the left panel, enable one or more AWS libraries under Networking, then click Apply.
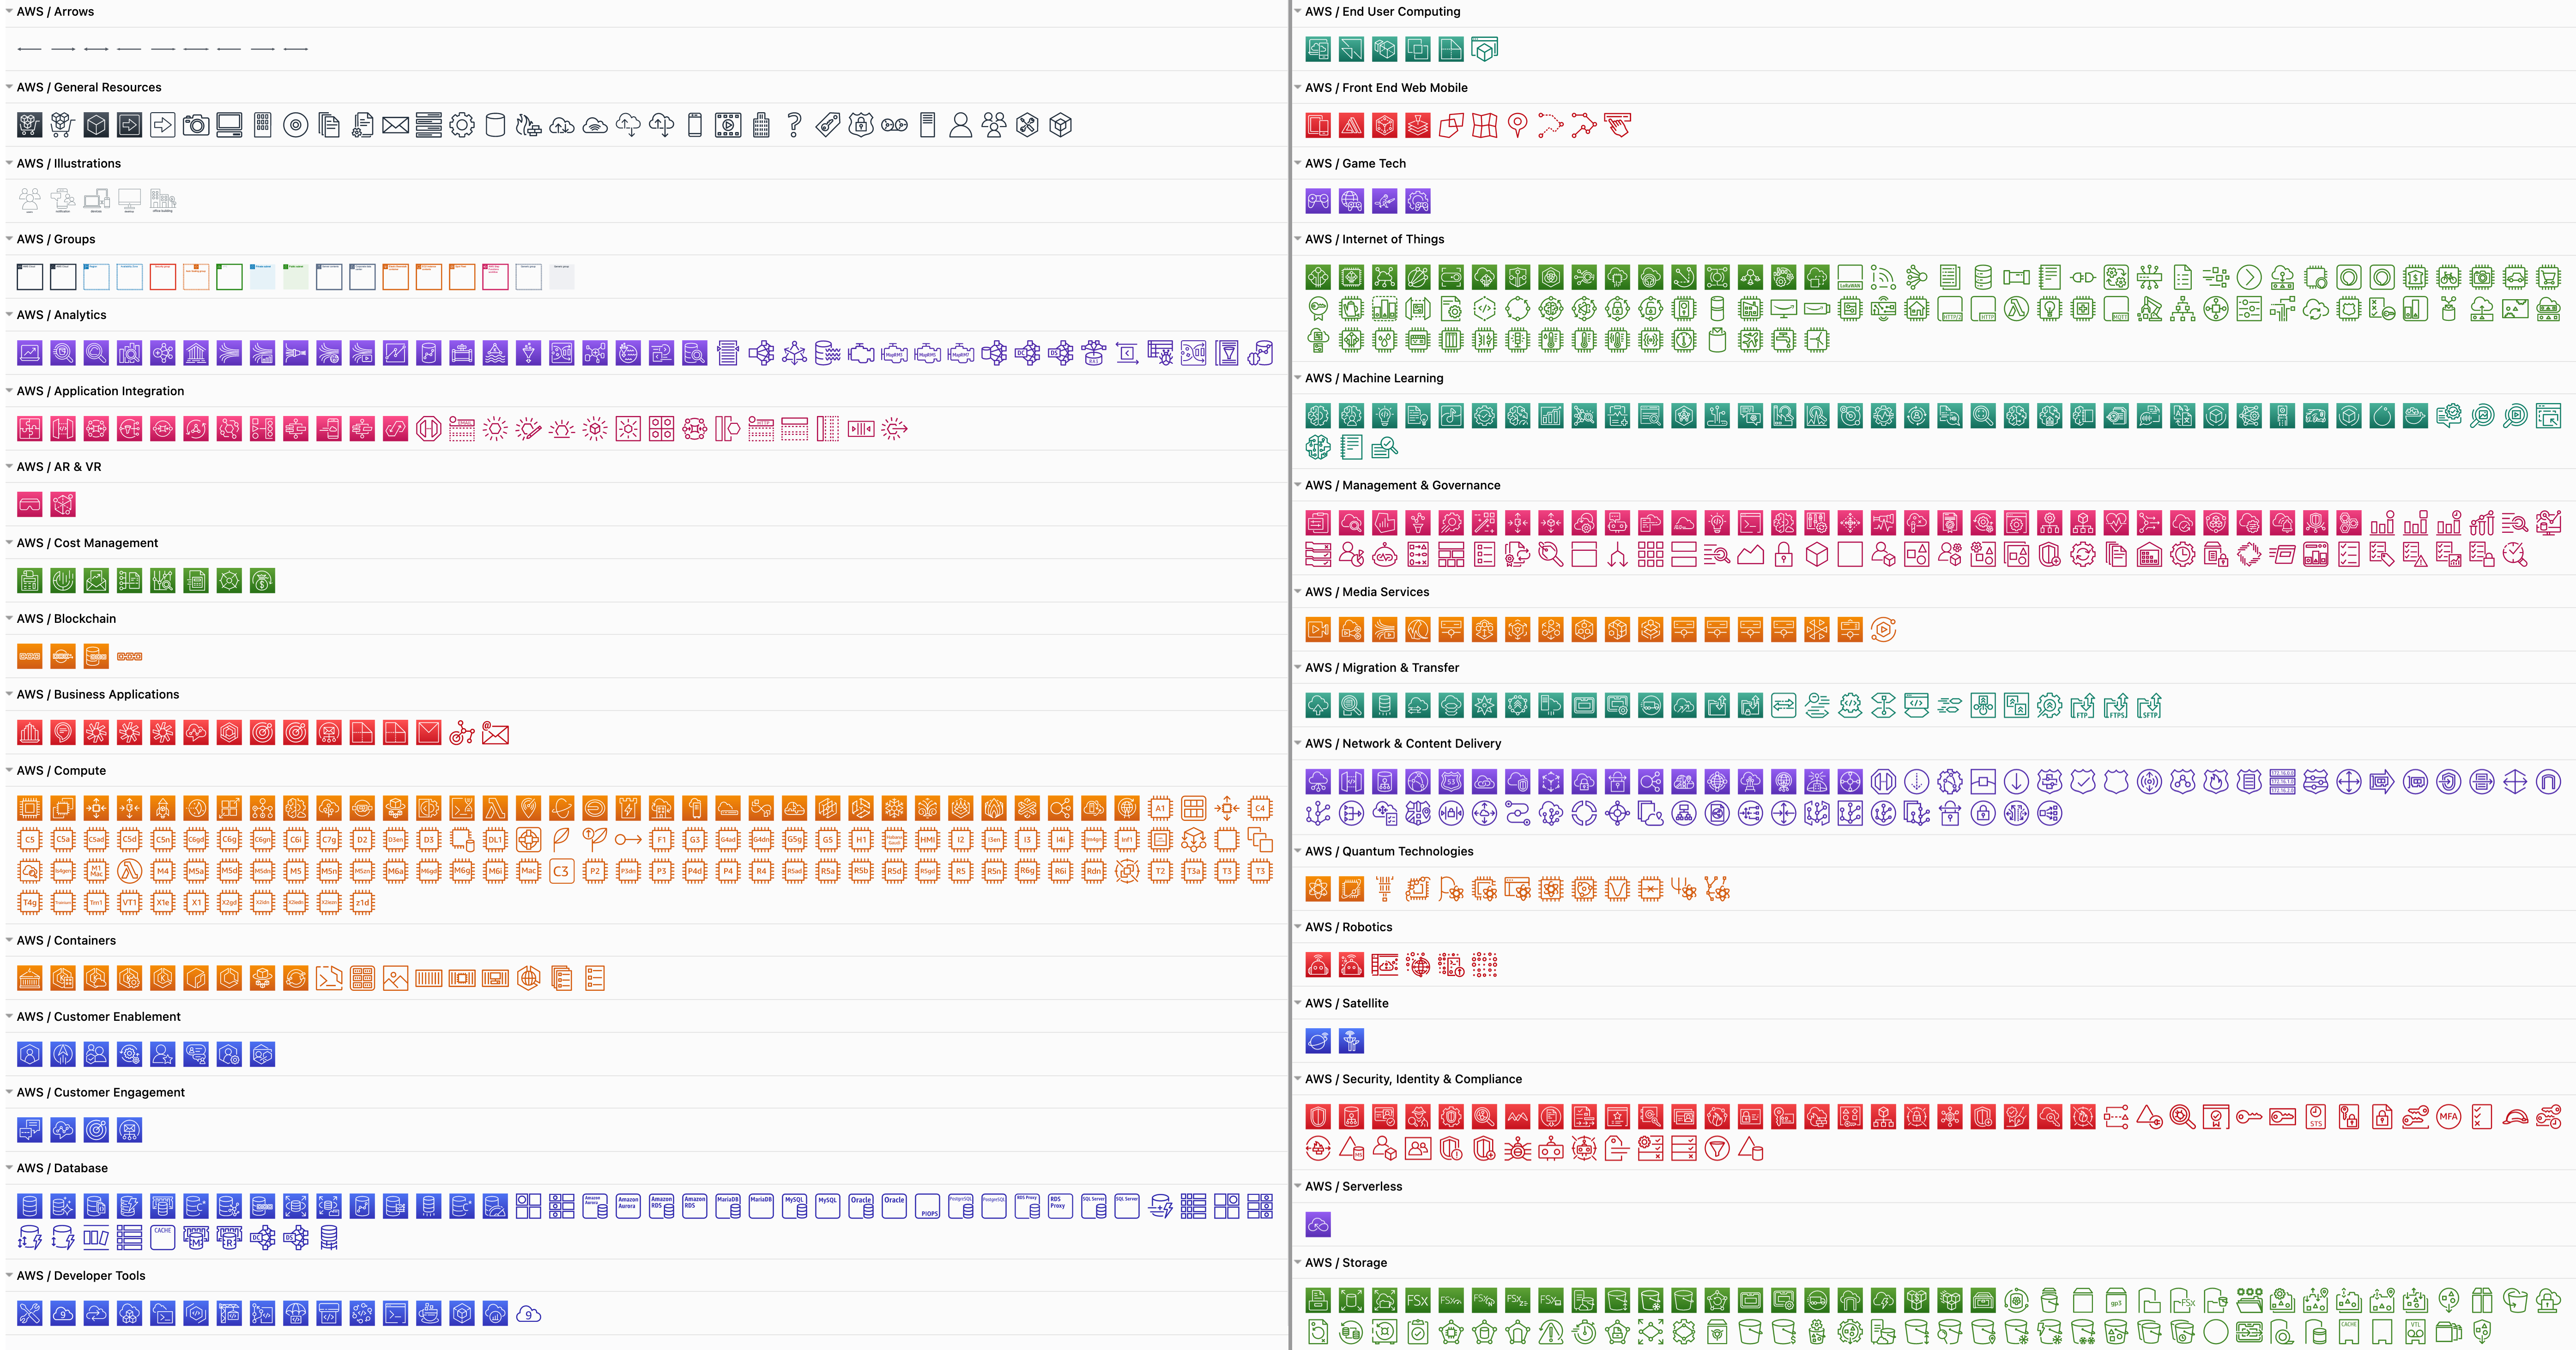
There are many AWS shapes available to visualise your AWS infrastructure. When you enable just one of the shape libraries above, you'll see a number of sub-categories of shapes appear in the left panel.
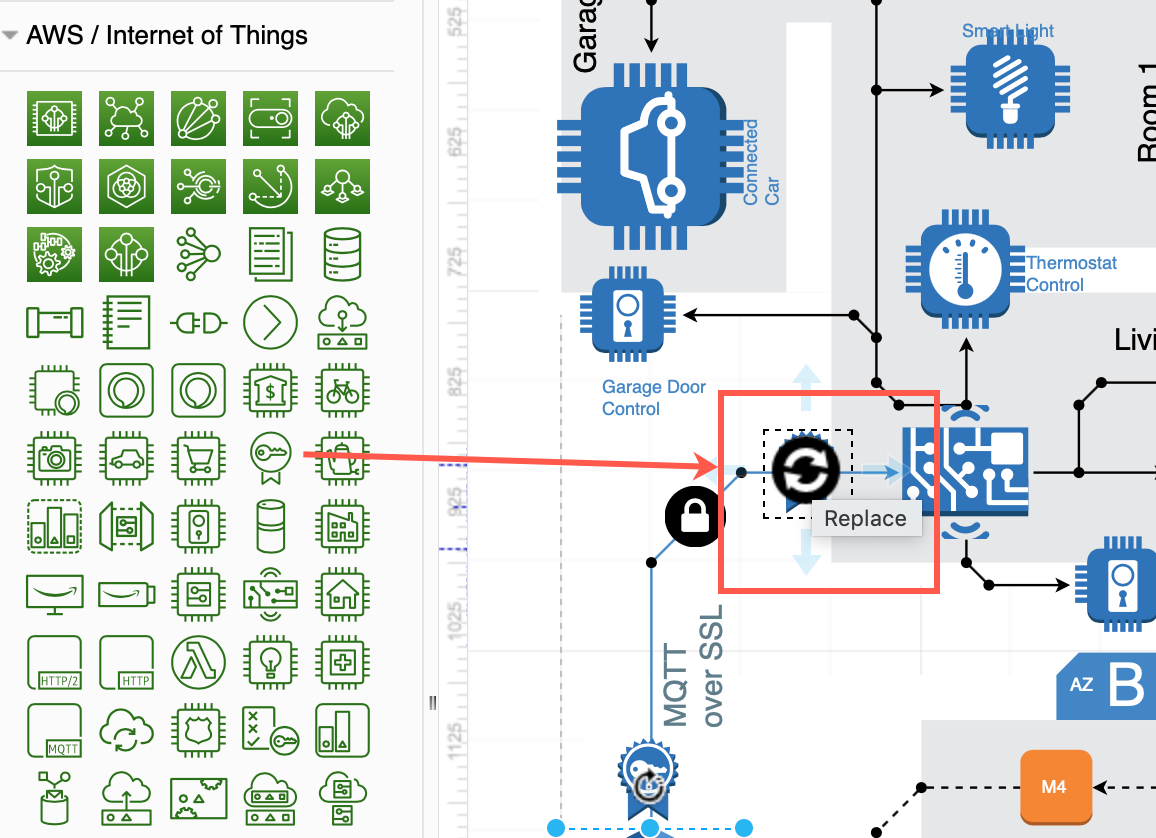
Replace shapes
Drag a replacement shape from a shape library and hover over a shape in the diagram until you see the black replace shape arrow appear. Then release. The shape you just dropped will replace the old shape on the diagram. You may need to tweak the size and style afterwards. Once you have replaced all the shapes, change the sizes and styles to multiple shapes at once to save time.
Copy styles
Select a shape that has the style you want to copy. In the Style tab of the format panel on the right, click Copy Style. Select one or more shapes that you want to update, and click Paste Style.
Copy sizes
Select a shape that has the size you want to copy. In the Arrange tab of the format panel, click Copy Size. Select one or more shapes, then click Paste Size.
In this example, all of the older AWS shapes and 3D shapes have been updated to use a more recent AWS shape library.

Open this AWS diagram in the free draw.io diagram viewer